Tag Archives: Make It Work Monday

Doll Leg Warmers

socks to leg warmers on dollMy girls love their 18″ dolls and they love to come up with new things to make for them. Recently, we took some socks that were WAY TOO SMALL for E and she wanted to make them into leg warmers for her doll. So, we used a similar technique to what we did for the stockings and socks.

sock to leg warmersock cut upsock piece neededsock top and bottom sewnsock seamsock finished as leg warmersocks as leg warmers done

Sewing lessons are not boring at all when it involves something the girls come up with on their own and want to make. I love their ingenuity and the growth they are making. Sewing with them is fun! At Home.
Make It Work Monday Title

Make It Work Monday – doll stockings

stockings 10This week is going to be bringing you a couple more reviews so I will make an effort to sandwich them between some other posts. Today, I’m sharing with you the stockings we made recently for the girls’ American Girl dolls.

stockings

We have been going through the mending piles and pulling out the things that are actually not repairable but that have some good material to them. I have saved several pairs of stockings the girls have put holes or runs in. Most of them are microfiber stockings so they are pretty durable and don’t actually run. Unfortunately, they do tear. So, we have several that had big holes in the knees. I kept them and we made them into doll socks and stockings the other day. Here, in pictures, is the process for the stockings.stockings 1

stockings 2stockings 3stockings 4stockings 5stockings 6

If you have questions about how we did this, please ask in the comments. It makes sense to me but I often sew by instinct. That makes it a bit harder to share information sometimes. If you don’t understand something, I will try to clarify. Thanks for stopping by.

stockings 9

At Home.
Crafts / Handiwork Ideas and Tutorials

From Tee to Tee

Tee to TeeIt has been a bit since I have gotten a Make It Work Monday post up but I did get one ready for today. And it is cute! A while back I got a free T-shirt pattern from Liberty Jane. It was a freebie they were offering on their website. I hadn’t done anything with it.

tee to tee skirts

Back in December, I was lengthening a BUNCH of the girls’ skirts. I think I did 13 between the three girls. And since I was working with knits, I had to figure out how to match the fabric type. I decided to recycle the old T-shirts that were in really good shape but either didn’t fit anymore or weren’t getting worn. I just cut the bottom section off of the tees and added it to the bottom of the skirts/dresses. Here’s the results of a couple of them.


Well, that left me with a couple of tops of tees that were really cute. So, I decided to hold onto them so I could recycle that part into T-shirts for the dolls. I did that today with the pattern from Liberty Jane. And, here’s the final product of that one.

tee to tee 2

Have you recycled anything lately? At Home.


Make It Work Monday Title

Shipwreck Dinner

Make It Work Monday is a different type of post today. A recipe. For you to make work for your family.

This is one of those simple, quick dinners (or lunches) that is filling and not expensive. Something we really needed tonight. We went on a field trip today. We left at 10 and got home at dinner. I needed something I could get on the table in about 30 minutes. This is it.

Shipwreck Dinner

Basic Ingredients:
1 C long grain rice, cooked according to package directions

1 C ground meat, browned (We used ground turkey.)

1/2 C chopped onion

2 carrots, sliced

1/2 green bell pepper, chopped

1/2 red bell pepper, chopped

1 cup corn

1 cup peas

2 T olive oil

salt, pepper, garlic powder – to taste


Directions: Cook the rice according to package directions. Put the onion in a skillet with a couple of tablespoons of olive oil and cook for about 3 minutes. Add the sliced carrots. Cook for about 3 minutes more. Add the bell peppers and cook for about 5 minutes. Heat your corn and peas and then add them to the mixture. Add the browned meat. Once the rice is cooked, add it to the skillet as well. Season with salt, pepper, and garlic powder to taste.


The beauty of this recipe is that the recipe is not set in stone. No peas or corn but you have left over mixed veggies? Or maybe just some broccoli? Perfect. Toss it in. No rice but you have some quinoa? Definitely. (This, by the way, is something I really want to do but on one else likes quinoa in the family.) No ground meat? Leave it out or throw in some of that leftover chicken. Whatever you have on hand works. If you like other flavors and spices, by all means, add them. I am pretty basic in what I like so I don’t do too much but my husband will add lots of spices.

The name is flexible as well. You can call it whatever you want. My husband calls it dirty rice. I like to call it Shipwreck Dinner. The girls go back and forth.

Whatever you put in and whatever you call it, this is a simple combination for a quick, healthy dinner that hits the table in about 30 minutes. At Home.
Make It Work Monday Title
 

Felt Board Christmas Tree

Christmas Cub tree 3

Christmas Cub book


One of our Christmas Books this year is called The Christmas Cub. It is written by Justine Korman Fontes. It is a really sweet little book about a bear cub named Pip who learn all about the traditions of Christmas. Evergreen does a wonderful job of teaching Pip and is rewarded with a gift that illuminates Christmas forever more – Pip hangs rainbows on her branches to decorate her and she becomes the first Christmas tree.


I really like this little book and love sharing it with the girls every year. This year, we created a Christmas tree felt board activity to go along with it. We used scraps leftover from creating a felt nativity and their countdown trees, which makes this a perfect Make It Work Monday post. Everyone cut and created shapes and ideas and we put them all together for this fun little activity.

Christmas Cub tree 2

To make the board, I just took a sturdy piece of cardboard and used Elmer’s Tacky Glue to glue a piece of felt to it. Use any color you like but a neutral color will serve as a better background for more activities.

To make the tree, I drew half of a tree for a pattern. We placed it on the fold of some green felt and one of the girls cut it out. Since it was cut on a fold, when you open it up, you should have a symmetrical tree.

To make the decorations, we dug through the pile of felt scraps and chose colors we wanted. Some of the pieces we just free-handed with the scissors. Others, I cut little patterns out of paper for and we used those to cut some of the ornaments.


Christmas Cub rainbow tree


Christmas Cub rainbows

We also made some rainbows to decorate the tree like Pip did in the book. To do this, we just colored rainbows on Sew-In Colorfast Fabric Sheets for Ink Jet Printers by June Tailor, Inc. using Sharpies. Simple. Really! Color and cut.


We actually made two of these. One is for our felt board that we have and all the girls enjoy playing with (even 10 year old E). The other is a present for some sweet little friends of the girls to share the Christmas spirit with them, just like Pip did in the book.

I have included a FREE pattern for you to use to make your own Christmas tree felt board activity. Just click on the link below to open the PDF and print or save. Feel free to share the link back here for the pattern. Christmas Cub tree pattern

Christmas Cub tree pattern

I’d love to hear about it if you make a felt tree activity. Let me know how it works and if you kids enjoy it. Blessings to you all this Christmas season. At Home.

Make It Work Monday Title


Christmas Wreath – No Shopping Necessary

Christmas Wreath 2

Today’s Make It Work Monday post is an extra and is one the kiddos can help with. We have been unwrapping a Christmas book each night and reading it. The next day we do an activity or craft that goes along with the book in some way. One of the books we read was The Christmas Unicorn. In the book, the little girl, Milly, gives her Christmas unicorn a wreath.Christmas wreath bookThat was our project to go along with the book – we made a wreath for Christmas, working together. It is not a fancy wreath and while I really like the looks of all those fancy wreaths I see on Pinterest, I just don’t see a reason to spend that kind of money. Even doing it myself would cost $30 or more for the materials. I like my shabby chic style wreaths. Especially when they cost $0. Zippo. Zilch. Nothing. I don’t have to shop. I don’t need specific materials. I use what we have on hand.

We began by looking around to see what we had. An old set of fairy wings that were coming apart. Lots of scraps of fabrics. Some ribbon left over from who-knows-what. Bingo – the makings of a wreath, no shopping necessary.

christmas wreath wings

We cut the fabric off of one-fourth of the wings. Each quarter of the wings is a separate piece of wire. Once we cut it away, one of the girls rounded it out.

christmas wreath form

Using my rotary cutter and a quilting square (both of which are totally optional but make the process go SO much faster), I cut strips of fabric that were approximately 1″x6″. I say approximately because it doesn’t matter if they are perfectly rectangular or not. They just need to tie.

Once I had about 20 strips, the girls sat down on the floor together to tie the strips to the ring. The process was made less tedious and repetitive by turning on A Charlie Brown Christmas to watch. Tying and watching, they filled up the ring with strips of fabric. I have no idea how many strips we cut and tied – probably around 350 or so. That is totally a guess, though. The more strips you tie on, the fuller the wreath will look.

Christmas Wreath

We rummaged through the ribbon drawer to find some pretty Christmas-y ribbon and tied a big bow at the top. All done. A simple, cheap, and pleasant Christmas wreath that the girls had a hand in and are proud of. Done as a family, everything is more fun. At Home.Make It Work Monday Title

Make It Work Monday – doll robe

Make It Work Monday Title

Today’s Make It Work Monday is a simple, easy one. At least, for me it was.

The girls had these sweet, long-sleeve PJs for winter. The problem: it is so warm here that they never, ever wore these. The material is so sweet: colorful hearts, some of which are glittery. So, I decided it was time to do something with the fabric. P1120571I picked up a bunch of doll patterns at the fabric store a while back when they were on sale for $1. This one is Simplicity 2303. It only took me about an hour and that included making the bias tape for the edging. It was a very easy pattern and it made a cute little doll robe. All it needs now is some ribbon for a tie, which I imagine I have tucked away somewhere. P1120572One done; three to go. Christmas is coming so I’d better get working. At Home.


Doll Purses

purses free tutorial

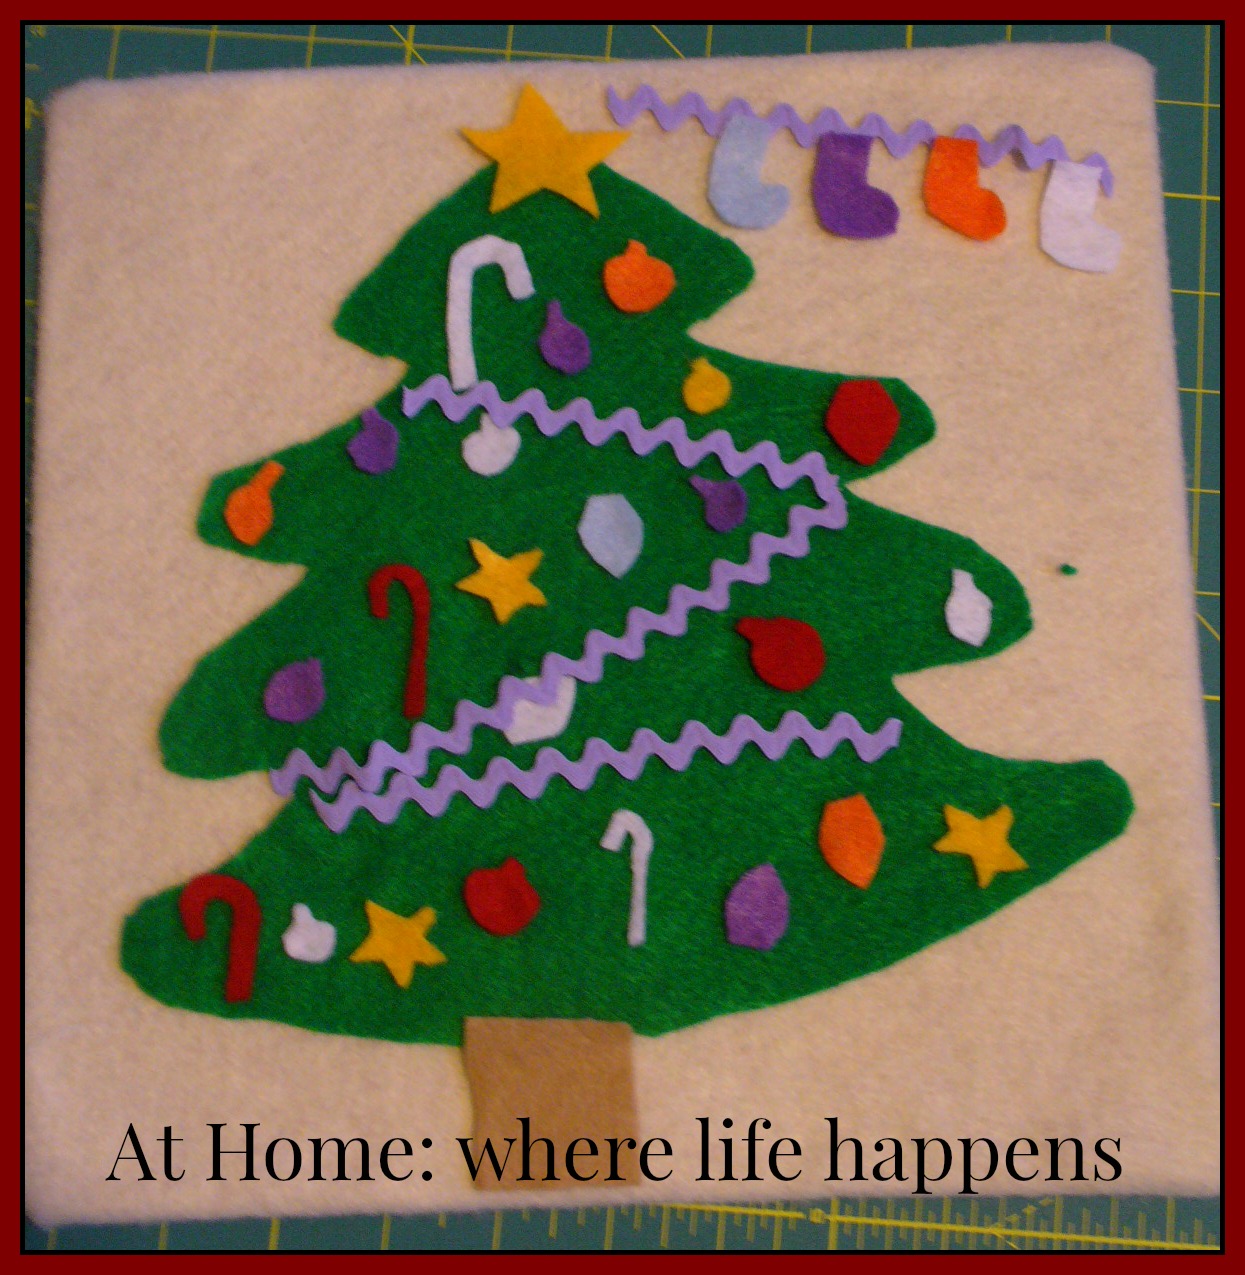
Make It Work Monday is all about accessories for 18″ dolls today. L came to me wanting to make purses to go in the boutique that she is creating for one of her dolls. She knew exactly what she wanted but didn’t know how to do it herself. She wanted to sew them. So, we went to work.

Heading to the sewing area, she described what she wanted and I pulled out some scrap fabric. We used scrap and leftover or salvaged pieces for every bit of these purses. We talked about each step before sewing it so she could veto it if things didn’t look right. Moving right along, here is what she created:

Purse design 1

Now, it is tutorial time! As we went along with the second one, I took pictures so that you could make some of your own. These are simple and, had I been doing them myself would only have taken 20 minutes, max. With L, age 8, doing the sewing, these took about 45 minutes. The second one was definitely faster than the first, so I suspect that future ones will be even quicker.

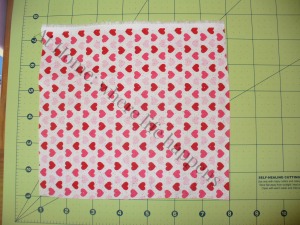
Step 1: Select and cut your fabric. This is a rectangle about 6 inches wide x 7 inches long. This can be adjusted for a wide or narrower, longer or shorter bag. Just modify for what you need.

Purse pic 1

Step 2: Fold it in half from the width, right sides together. Sew down the long side and across one of the short sides. Pin it before sewing if you need to. For a child, definitely pin it before sewing. It just helps keep the fabric lined up so well.

Purses pic 2

Step 3: Turn the fabric right side out. Press with an iron.

Step 4: Tuck the raw, unfinished edges in about 1/4″ – 1/2″. If a child is doing the sewing, tuck a larger amount in so it is easier to ensure that the raw edge is caught and held. If I am sewing it, I’ll just tuck 1/4″. Pin and sew. Press.

Purses pic 4

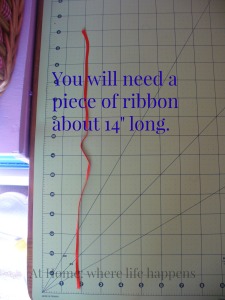
Step 5: Fold one end up about 3 inches. You will be sewing up the edge to create the biggest part of the purse. Tuck 3/4″ of ribbon in between the front and back of the purse, along the seam line you will be sewing. This will allow you to sew up the center of the ribbon, ensuring it is caught and held. Sew both sides.

Purses pic 5Purses pic 4

Step 6: Hand sew a snap on as a closure. (If you want to do a piece of Velcro and sew it with the machine, you should probably do that before step 5.)

Purses 6Purses pic 7

Step 7: If desired, add an embellishment to the front of the purse. L’s note: You can add ribbons and little buttons and things like that to make it extra special, the way that you want it.

Purses pic 8

Isn’t this a sweet little purse she designed? I love her creativity and her ability to see something in her mind and describe it in a way that I can help her bring it to reality. That is a talent that I dearly hope she is able to hold onto as she matures. It will be invaluable. I am so proud of L! At Home.

Make It Work Monday – horse jumps

Make It Work Monday Title

All three of the giggly girls love to play. One of the favorite forms of play at this time is pretending that at least one of the dolls is an equestrian. The horses come out with the dolls and all sorts of ideas go flying. During one of these intense sessions of equestrian play, L decided that she wanted a series of horse jumps for her 18″ dolls. She is very creative and an out-of-the-box thinker. She began thinking about how to make jumps. What came to mind was her favorite medium – paper.

She brainstormed a number of ideas but realized that while paper would work for the bar of the jumps, she would need something different to hold it up. Toilet paper roll tubes were the final decision and they have worked well.

horse jump 2

What she did:

  1. Take the toilet paper tube and cut a narrow half circle out of one side of one end. Opposite that at the same end, cut another narrow half circle. This is where the bar will sit.
  2. Cover the tube with paper. You could also color it or paint it but L chose to use construction paper.
  3. Make another one for the other side of the jump.
  4. Decide how wide you want your jump to be. L wanted it to be as long as a piece of paper and a half. So she took some of our pile of scrap paper, taped two pieces together, and rolled up it long-ways. She then used colored scotch tape and covered the whole thing.
  5. Place your bar on the two posts that you made.
  6. If desired, cut some fabric or felt to be the ground under the jump. This one has “grass” under it. We also cut some blue for water and some brown for mud or dirt. Options are always good.

Here is the final product, with her little sister using it for the pets.

horse jump horse jump 3

She has made two of these so far and there are plans for more. They have worked great for the horses, even for the Barbie-sized dolls, as well as pets. Recycling fun! At Home.

Make It Work Monday – skirt for me

Make It Work Monday TitleToday’s Make It Work Monday is a short one. A single skirt. That would be because I have been working hard at creating a Jasmine costume for the youngest giggly girl. We finished it a bit ago (Sunday afternoon) and J is thrilled with it. All we lack for it to be completely finished is figuring out what she wants to do about shoes.

This single skirt is the only “Make It Work” work I got done. But I am thrilled with it because I have been missing this skirt. For months! The elastic died in the waist band and so it got set in the mending pile. That pile got packed away for a short time. Then, I got the skirt out, cut the dead elastic out, and other things came up. So, the skirt just sat. I decided that I was going to fix it because I wanted to wear it again before it got cool/cold. So, I did it. And, my skirt fits lovely again.

blue flower skirt

What have you worked on lately to “Make It Work?” Please share links to anything you have made work lately and I’ll go check out your post. Thanks for checking out this week’s “Make It Work Monday” post. At Home.